The measurements are SPECIFIC to make it fit on a ATC.

I used the creasing tool (black blade) on my Fiskars trimmer to make these creases.

This shows the paper creased

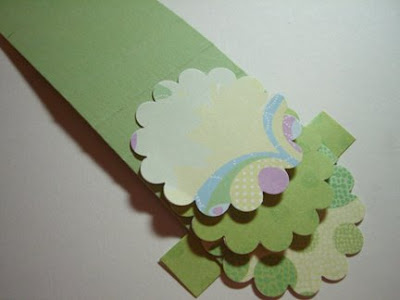
I punched out my shapes, could be just squares. Note: they are 2 sided so you need 2X whatever you are using


Glued the shapes together so they are decorated on both sides


Now it is time to put on the "slider" bar


You glue/tape it (design side) to the backside of the actual part that moves


Now we are going to attach the parts that "flow"

Notice you only glue them to the small section of the waterfall


Do that will all of them

Fold the long unadorned piece behind the decorated side

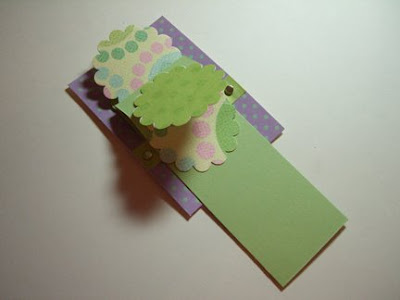
Now we are going to attach the "slider bar" that holds the waterfall to the card


With a paper piecer we make holes for the brads


The only thing holding the front (the waterfall part) onto the back card are these brads. You can choose to glue them down if you'd like but ONLY put glue on the small tabs that are not glued to the waterfall part. (The waterfall WILL NOT work if anything else is glued down).

You now can pull on the long unadorned piece and the waterfall should "flow"


Here's how it ended up:


Here are 2 other versions:


Please e-mail me or leave a comment if you need any help.


very cute - nice updated idea for the waterfall card - thanks for sharing it
ReplyDeleteHave to try this out for my next ATC swap. Thanks for sharing.
ReplyDeletedoramiyi
doramiyi at gmail dot com
-CANADA-
I arrived here via Barefoot Stamper and it only took this one look for me to subscribe. You've made this so easy to attempt. I don't do ATCs, but can always try it in miniature and use it on a card front, if I want. I'm looking forward to seeing what else you have to offer. If any of it is like this, I'll be hooked!
ReplyDeleteTHIS IS MY NEWEST FAVORIT BLOG!! I love reading your stuff..
ReplyDeletePriscilla aka priscillastyles
Thank you for adding the descriptions. I had not realized the tiles were double sided. I love your blog. Thank you for posting all that you do. It really helps a beginner and gave me courage to try something new. I LOVE this little card.
ReplyDelete