Buck Card
Supplies:
Paper Solid: Cream- Archivers, Blue-Stampin' up
Paper Patterned: Making Memories "Just Chill in"
Ribbon: May Arts Tools: Prisma Colored Pencils, E57 Copic, Cricut-Accent Essentials Cartridge, Fiskars border punch, Brown StazOn and VersaColor Pinecone #171
Instructions:
I cut down the blue paper to A2 size. I cut down the plaid paper to be slightly smaller than the A2 card so when Its mounted to the blue paper you can see just a little of the blue border. I used the Cricut to make the plaque that is mounted behind the deer, using the Accent Essentials Cartridge Acct#48 at 4". I used my Copic to edge the plaque before I glued it down (I did not want to see the white of the paper). I also edged the small border that is on top of the sentiment block with the Copic. I printed the "Happy Birthday Dad" on my computer, the font is called Haettenschweiler. I edged this block in the VersaColor just to add some depth. I glued the border tot he edge of the sentiment block, added pop-dots and mounted it on the card under the deer. Added the woodgrain ribbon tied in a knot to the spine of the card.
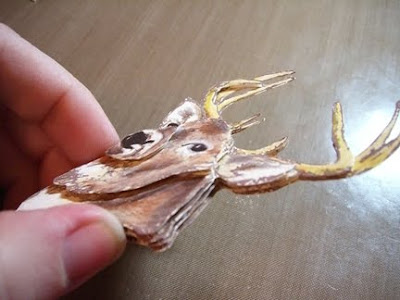
Here's how I did the Deer:
He is stamped 6 times on cream paper using brown Stazon. I colored all 6 of them the same using Prisma Colored Pencils. (There are an extra 2 on this sheet-the top corners. I was experimenting with how I wanted to color him.)


Next you need to cut out all 6 deer. I first cut out his nose, then the next layer is the nose, eyes and jawline. And so on and so forth, using up all 6 stamped images.


No comments:
Post a Comment
Thank you for leaving a comment, I look forward to reading it.